
I was inspired to make them by a wonderful book called (surprise surprise) Cake Pops, by Angie Dudley, a.k.a Bakerella.
At the moment I own this on Kindle, which is not very practical, because Mr Cupcake gets annoyed when his iPad gets cake, icing and food colouring all over it.

These little chicks have a hard coating, with a moist and delicious mixture of chocolate mud cake and coffee cream cheese icing inside.

As you can see in the pic above, you need to stand the cake pops up in some sort of stand, both while they are drying, and also to display them. Therefore my preparation started with power tools because I needed to make a customised stand.
This process involved turning the garage upside down trying to find a spare piece of wood, then trying to match a lollipop stick to my much depleted box of drill bits. There was much cursing as I wondered where do all those missing drill bits GO?

I found an elegant wood block that had originally been part of a timber vase and was missing its glass inner piece. I thought this would make a nice stand. You can see the lollipop stick and the corresponding drill bit.
Miraculously the drill battery was charged - well, half-charged - so I proceeded to drill some holes to make my stand.

Because my drill was half charged, the drill bit was quite shit and the timber was very hard, the drill holes ended up quite shallow. They worked ok but I'll deepen them at some stage so that the pops will stand up more securely.

So with the hardware put away, it was time to tackle the pops!
Firstly you need a cake - I had some odd shaped pieces of chocolate mud cake in the freezer that were left over from a previous cake decorating session (actually, from making my sushi cupcakes the I described in a previous post). So I used these leftover pieces because the size and shape didn't matter - it all had to be crumbled.
I crumbled the cake with my fingers, making sure that there were no large pieces left. You could do this in a food processor if you wanted.

Then you have to mix some icing into the cake crumbs, so that you get a firm, dense and moist mixture that can be shaped into balls. You could use any type of icing - I made a simple cream cheese icing (one part spreadable cream cheese to three parts icing sugar) and flavoured it with some cafe trablit, which is a strong coffee syrup,
This is the icing being stirred into the cake. Put in about a tablespoon at a time and stir it thoroughly each time, until you get a texture that starts to ball away cleanly from the sides of the bowl.
Once you have a texture that is firm and truffle-y, but not sloppy, you can start rolling cake balls. Lay some baking paper on a tray, and make sure your hands are clean and completely dry.
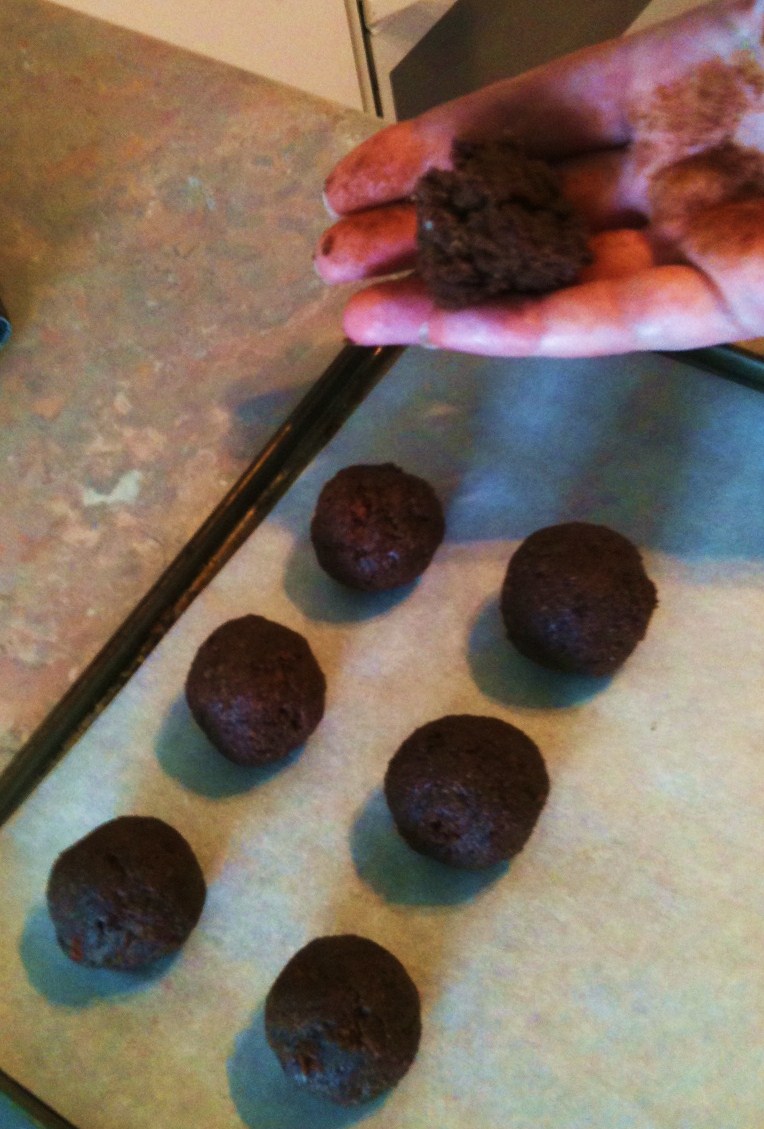
Scoop the mixture by spoonfuls into the palm of your hand. You need about a large teaspoon, but it's up to you what size the cake balls should be. Roll them gently in your palms until they are spherical, then place them on the baking sheet.

I included this pic so you can see the texture. They do not have to be super smooth, but they need to hold together well without crumbs going everywhere.
You may have to wash and dry your hands every so often because the rolling process gets harder the stickier your hands are.
When you're done, put the tray of cake balls in the freezer for 15 minutes (or leave in the fridge for a couple of hours) and get your decorating things ready.

For the little chicks, they need little feet and beaks made of orange. In her book, Bakerella uses a variety of ready made lollies, cachous and candies for this purpose but I didn't have any, so I rolled some orange decorating fondant and stamped some tiny stars...

....and hand-rolled some tiny fondant cones for the chicks' beaks.

To make the coating for the chicks, you need some yellow candy melts. These are available in cake decorating stores and come in a variety of colours. The name is a little deceptive - they are not really 'candy', as in lollies or sweets, they are more like white chocolate, and are made of vegetable oils, milk solids and sugar.
A possible upmarket alternative would be to get white chocolate couverture pastilles and tint them yellow with chocolate tint (but note this is not the same as gel food colouring that you use for tinting fondant).
Melt the candy melts according to the packet instructions - you can microwave them, or use a double boiler.
When the candy is melted and smooth, turn it into a deep, narrow bowl so that you have a depth of at least 10cm. Sit this bowl in a larger bowl filled with hot water so that the mixture stays melted for longer.

Take the cake balls out of the freezer. They should be cold and firm but not frozen.
Take a lollipop stick and dip it into the melted candy to a depth of about a centimetre. Then stick it into a cake ball, just until it's about halfway through the ball.

Then carefully dip the cake ball into the melted mixture until it is completely submerged. Don't stir it around while it's in there - you don't want crumbs coming off and messing up your dipping mix.

Gently lift the pop out, then tap the stick on the side of the bowl, 7 or 8 times, to allow extra candy to flow off. This will form a little ribbon coming down off the pop into the bowl. Every now and then, rotate the ball a little so that the coating stays relatively even.
When you have a nice even coat, place the pop in your ready made stand to dry hard.
Repeat with all other cake balls.

When the coating has dried, stick the 'beak' on with a little extra candy coating (wow, I made a messy job of that one - oops)

Then stick two little stars on to the bottom of the pop - these are the chick's feet.

Use some black food colouring and a pair of tweezers, cleaned and sterilised, to dot two little eyes on the chick.

This is a terrible pic but it gives you the general idea. You can dot both eyes at once, equidistant from the beak.
And hey presto - there is your little chick cake pop!

If you want to give your cake pops away, you can customise a box to store them.
To make this, I used a spare gloss cardboard box that had been used to hold a desktop calendar.
I got out my trusty drill (rapidly losing power at this stage) and put holes through the sides at regular intervals.
The sticks of the pops can then be inserted through the holes to keep the pops in place.
The pops are actually quite tough but beware of knocking the beak or the feet as they can break off.

I'm happy to report that the little chick cake pops tasted good too. They were moist and full of chocolatey goodness. Their little hard coats were satisfyingly crisp and they held together well on their sticks.
Here's to lots more experiments with cake pops!
No comments:
Post a Comment