Showing posts with label almond biscuits. Show all posts

Tuesday 20 December 2011

Miniature gingerbread houses for Christmas

Christmas just wouldn't be Christmas without a gingerbread house. This is a wonderful European tradition that is decorative as well as yummy, and seems to be only growing in popularity the world over.
This year I was inspired by a design from Megan (notmartha.org) who made tiny houses to sit over the edge of a coffee cup. While I didn't need mine to sit on a cup, I love the miniaturising idea so I helped myself to her templates and instructions, which you can find here.

None of these pictures really show the scale of these houses but if you're trying to work out how big they are, they stand approximately 10cm (4in.) high from the base to the top of the roof.

My family is partly Norwegian in origin so I was delighted to find that gingerbread houses are a huge thing in Norway. In Bergen at Christmas each year, people build an entire gingerbread city.
It is called a Pepperkakebyen.  I KNOW.


I can't compete with those crazy Norwegians and their awesome city, but I did make a little street of tiny houses.

Actually, it would be wonderful for a Christmas party to make lots of these little houses and arrange them like a little village. Maybe I'll do that next year.


I decorated the houses all differently. I admit, I was a little distracted doing these and just used whatever I had to had, but if you planned it out in advance you could stock up on lots of little sweets for decorating.
I used royal icing, piped (messily) in loops and straight lines on the roof, then stuck a variety of lollies, mini M&Ms, hearts, stars and freckles on.


This roof was just little jelly watermelon halves, hearts and royal icing.

I actually liked the restraint of just using red and white - some of the others were a riot of colour and ended up looking messy.


So how do you start? There are so many different types of gingerbread out there. If you want to make houses you will need a recipe that makes a firm mixture that will dry hard-ish (think of a gingerbread man - it's not crumbly or bendy, but firm and a bit chewy - that's the texture you want for gingerbread houses).

Martha Stewart has a great recipe for this purpose here. OF COURSE she does, she's Martha Stewart.

It makes a sticky, gooey dough mix which you can see in this pic. (I actually had a near disaster with this recipe - I made it all, and tipped it out of the mixing bowl to knead it, thinking "this is so dry! How unlike Martha to make a bad recipe!" ... only to realise that I had forgotten to put the molasses in. Luckily I remembered in time and piled it back into the bowl and dumped a truckload of molasses on it, and it was fine.)

Because the dough is so sticky and tacky (well, it is if you remember the molasses) you need to chill it in the fridge or freezer for a while before even attempting to roll it out.

When you do roll it out, to prevent it sticking to your rolling pin, bench, hair, face and entire kitchen, put the dough on top of a sheet of foil, then put a sheet of clingfilm over the dough and work the rolling pin over the top of the clingfilm. This way you can roll it out flat like in this pic.


When you've rolled the dough out flat to the size of a baking tray, put it onto the baking tray you'll use (still with the foil underneath, but take the clingfilm off the top) and put it back in the fridge while you prepare your templates - I made these from notmartha's PDF. They are made of thin card that won't tear.


Grab the baking tray out of the fridge and lay the templates down on the dough and use a sharp knife to cut around them. Then GENTLY peel away the excess dough, being careful not to stretch or distort your template shapes.

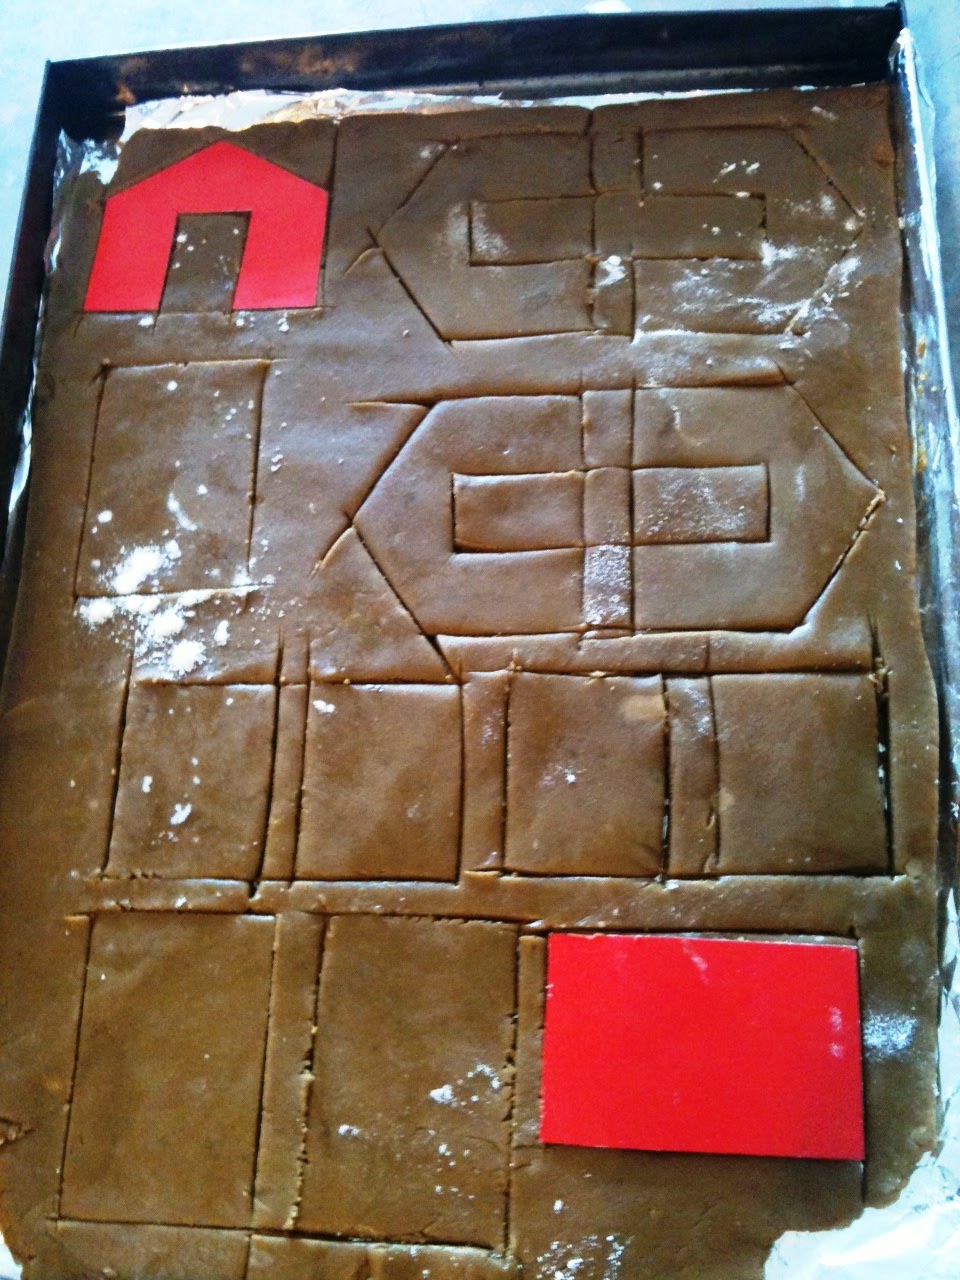
The excess dough can be re-rolled.

For each house you need two of each of the three shapes. SO for instance, in this baking tray, I have enough shapes to make two houses, plus an extra frontage.

You'll need a whole afternoon for this process. It takes time.


You need to put the tray of finished shapes back in the fridge to firm up again before baking, or they will rise too much and the shapes will deform.

After they have been chilled, they can be popped in the oven for 10 minutes to bake. This tray of cooked shapes is the same tray as the one above. It was the first tray I baked and I overcooked some of the shapes - you can see at the bottom that the big oblongs are a bit too coloured.

When you first take the shapes out of the oven they are a bit soft and at this stage they can be trimmed around the edges if they have risen too much or aren't straight.


 When the shapes are cool you can start constructing the houses!

I used a packet of royal icing mix from the supermarket but if you want to make your own, of course Martha Stewart has a recipe.


I found it easiest to lay the front of the house flat and stick the two side walls on, then put the back of the house on top of these. At this point you can carefully turn the house upright and the walls should all support each other.


Next come the roof panels.


Put them both on together and hold in place for a few moments.


Then pipe some royal icing into the gap between the roof panels, and leave the house to dry.

It surprised me how stable these little houses were once they had been put together. They were pretty indestructible. It turns out royal icing has magical sticking power.


The only thing remaining is to decorate your houses in any way you see fit.

If you are doing this with little people I recommend you make the dough, the shapes, bake them and construct the houses by yourself, and then have a big decorating session with the kids - the first stages are time consuming, difficult and tedious for littlies but the decoration stage can be enjoyed by even very young kidlets.


Happy Christmas!!

Wednesday 2 February 2011

Melting moments and ricciarelli: flour and butter v almonds and eggs

If we put macaroons on one side for a minute – I know it’s hard – my other favourite bickies are melting moments and ricciarelli.

Melting moments are apparently an Australian invention based on Scotch shortbread, they were first mentioned in an Australian cookbook from 1928. 
 
 They contain the same ingredients as traditional shortbread (flour, cornflour, sugar, butter) but whereas shortbread is baked in slabs or ‘cakes’ and stamped with a pattern, melting moments are small bite sized drops.

At some stage after the 1950s they began to be sandwiched together with jam or icing.

I like using a vanilla flavoured biscuit with a sharp lemony icing/filling. The icing is butter, icing sugar and lemon juice. It needs to be spreadable but stiff, so that it dries hard and sticks the bickies together. 

My recipe is from a book called '100 Cookies' but you can google recipes, they are all pretty similar. 


Ricciarelli (pronounced ‘richie-a-RELli’) are a type of macaroon I guess. They are Italian biscuits made of ground almonds, sugar and egg white and they are moist and chewy rather than crisp’n’crunchy. They can be flavoured with lemon rind which works really well. 
 

I just googled the name and I found out they are named after an Italian prince, Ricciardetto della Gherardesca from Volterra, who apparently invented them when he came back from the Crusades in the 14th century. 
I am now imagining a knight in full armour clanking around a massive castle kitchen trying to grind almonds really finely while Baldrick beats the egg whites. 


Anyway, here in the 21st century there is a great recipe for them in Nigella Lawson’s How to be a Domestic Goddess cookbook, thanks Nigella. You get a very sticky mass that you need to hand-shape into diamonds (using icing sugar to stop them sticking to your hands) and place on a baking tray to harden up before baking. 
You are supposed to leave them overnight but I always get impatient and try to bake them same day. 


Here is Jade helping out in the process by trying to speed up the drying with a hairdryer.

Unfortunately it didn’t really work and while you still end up with yummy biscuits, they look swollen and malformed, not the little neat diamonds that you want. So, always best to follow the recipe – sigh.